If you're creating outdoor levels, soon or later you're going to have to create hills or mountains. Not only are they essential for acting as a natural border to prevent people from seeing past the edge of the terrain mesh, or to control line of sight within the level, but they also look pretty. Level design is a combination of functionality and aesthetics, and you need both in order to make a truly great level.
For this post, I'm just going to focus on creating a nice hillside in the Dragon Age toolset, using an example from a level I've been working on. This isn't a demo of a walkable area, but just for scenic hillsides the player only gets to look at. Also note that I'm not going to cover texturing in this post, as that is a lengthy topic in itself. I'm going to assume that you understand the basics of navigating the level editor and using the terrain deform tool.
However, here's a couple of quick tips when dealing with the deform tool. The first trick when dealing with the level editor is to get used to using the "-" and "=" keys to the right of the number keys. These will decrease/increase the size of the brush you're using to deform the terrain. I also find that you typically want to adjust the "Max Strength" parameter down to 30 when you're doing your "detail" sculpting of a level. Reducing the "Max Strength" parameter means your mouse clicks will affect the terrain less for each click, allowing more precise control, which is what you want when you're trying to add complexity into the terrain mesh. This is what you do once you've got your basic hillside structure created, like the picture below. (As per usual, click for a higher resolution screenshot)
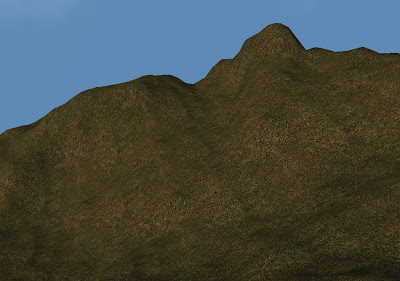
So from the above picture, I've got a basic hill/mountain shape. It's fairly bland at the moment, and needs a fair amount of work. If you study hillsides you'll notice that large uniform patches of gradient don't really occur. So you need to take a medium sized deform brush (Outer Radius of 4/5, set to Raise/Lower), and accentuate the natural ridges in the terrain. You need to create elevated ridges that run with the lie of the land using the left mouse button, and then the right mouse button to lower the areas in between. The idea is to create small hollows or "ruts" in the landscape, just like the ridges that form in natural landscapes. Note that while the ridges should trend in roughly the same direction, do not have multiple ridges perfectly parallel to each other. Perfect straight lines are very rare in nature, so if you find you have a parallel ridges, put a slight bend in one of them. Don't be afraid to "link" it with an adjacent ridge if it comes close enough.
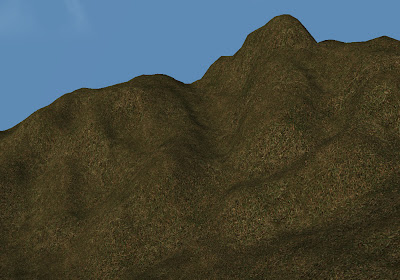
With the key ridges in place, we're now able to decrease the brush size slightly and further tweak the terrain. For particularly prominent ridges, you will want to create "sub-ridges" running perpendicular to the main ridge. This will break the uniformity of the main ridge and give the terrain a far more realistic look. You also need to put some variance into the gradient of the main ridges. Don't allow them to continue down uniformly, but put in small plateaus. Ideally you'll only be using the deform brush, for this purpose, as the plateau brush itself is prone to creating very steep cliffs, which are harder to make look good, especially for a beginning level builder. The idea is to have small mounds or depressions within most of the "core" ridges of the hillside, many of which will have their own sub-ridges leading off them.
One thing you need to pay attention to when using a smaller brush size is to avoid terrain "spikes". The Dragon Age toolset features a "tesselate" option, which allows you to further subdivide the terrain mesh in particular areas to help avoid this, but extra subdivisions are not always required. With some close up and subtle use of the deform tool, it is possible to fix these spikes. See the picture below for a spike and a sharp line-width ridge. I've increased the "Grid Opacity" to make the mesh shape more obvious for this image. This is often useful to do if you need to examine the mesh structure more closely.
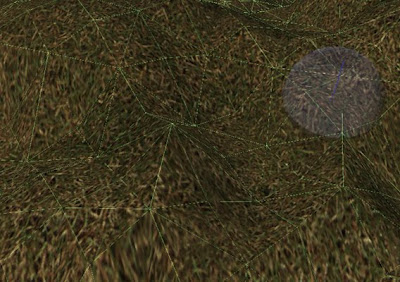
Using a deform brush of size 1 and the "Max Strength" set to 10, I first lower the height of the "spike" vertex (where point the green lines meet) and raise the height of the vertices to its left. This creates a more natural peak/mini-plateau instead of a spike. For the line-width ridge, I do a similar thing, raising the height of the adjacent vertices. I also drop the height of the bottom part of the "ridge" and raise the height of the vertices adjacent to it in order to have a less dramatic height difference along that line. As a result, the ridge is far less prominent and looks much better.
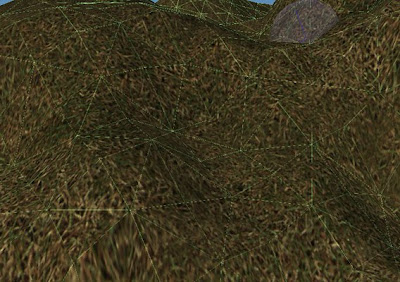
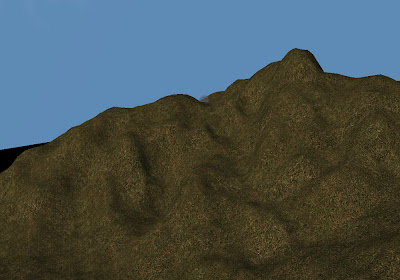
The last image I showed of the full hillside isn't the finished product, as there's still a few ridges that are too close to being parallel that I need to fix, but this should give you an idea of how to go about creating your own hillsides or mountainsides. Also, don't worry if you don't feel like it looks like much of a mountain side while you're creating it, and resist the urge to start texturing as you go. You'll end up with a more interesting landscape which will look far better once you actually do apply the texturing.
PS Not so subtle reminder to vote in my poll to tell me what you want from future blog posts.
PPS If anyone knows the guys who made Return to Korcari Wilds - please put me in touch with whomever did their PR! In one month they've got more downloads than Alley of Murders has had in four months. Tell me how they got the word out about their mod!


You can also use the Smoothing brush with a low 'Max Strength' value to get rid of the spikes. Works almost the same as you've described doing it manually -> lowering spiked vertex and raising adjacent vertices.
ReplyDeleteAn excellent point. A fine touch with the smooth brush can serve the same purpose. Thanks for pointing that out. However, you occasionally want/need finer control because you ONLY want to affect that single vertex. In that case, you might need to adjust the inner size to 0.5 as well.
ReplyDeleteUsing the deform method is frequently necessary when dealing with overhangs, as I find they generally don't react well to smoothing.
Yes, the smoothing tool usually kills the overhangs - better to use the deform tool in that case. Even better to first apply the Tesselation tool to increase the vertex density and then use deform to tune it - especially when you want smooth low-height (I don't really know the term but I am referring to the height of the overhanging portion here) overhangs.
ReplyDeleteNeat article, btw!