For quest or plot ideas, I recommend writing or typing all your ideas down, even if as you're writing them you decide don't like them. Even if the idea doesn't suit currently, it might be possible to use that idea later on in a different area to give a quest/story a slightly different spin. However, when doing level design, I strongly recommend using pencil and paper. To explain why, I'll explain the rough process I go through to design a level - before I even touch the toolset.
Concept
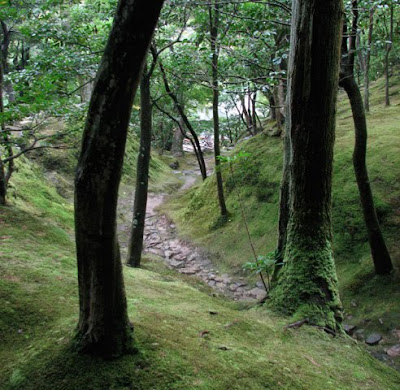
First, you need to work out what type of area your level is. Is it mountainous, hilly, dark/light, forest, snowy... You get the idea. The point is that you should have a general idea of the landscape of your area and its features. If you're not sure of the type of features that might exist in that particular terrain type, do a google search of landscape images, to see if you can't get a better handle on it. Ideally, you'll have a mental image of one (or maybe even several) "glamor shots" of interesting terrain. This might be a canyon, a lookout, or even a bridge over a river, that you want to incorporate into your level. Maybe something like this might be your inspiration:

Purpose
You also need an idea of what this level is used for in the game. Why does the player travel here and what will they do there? This will dictate the layout to some degree, as the areas the player will walk along and fight in. If they're trying to reach some goal, the entrance to the area should not be right next to that ultimate goal.
Initial Design
Your concept and purpose should give you enough of an idea to sketch out a top down map view of the area on pencil and paper. How you'll go about doing it varies - you might start with sketching out the area for your glamor shot, or perhaps the area of the key encounter of the area, or maybe where the player enters. I find it easiest to map out the path of the walkable area of the level, filling in the bits around that with small symbols indicating what is blocking the player, be it hills, rocks, trees, fences, buildings, etc.
Gameplay Concerns
As you do or review your rough sketch, you need to consider its effects on the player and gameplay. At a basic level, ask these three questions:
- Is the level a single linear path?
- Does the level require a lot of backtracking?
- Is the level too open/enclosed?
If the level is linear, players can become annoyed due to a lack of choice in how they move through the level. If the level is very small, then this is less of a concern.
If the level requires a lot of backtracking players get bored. No one wants to walk through long empty paths where nothing happens.
If a level is too open the player can potentially get lost or spend a long time searching the entire area. If the area is too enclosed, then there may not be enough room to manage fights properly.
If you pick up a book on computer game level design you'll see there are many more issues to consider, but asking those three questions will help immensely.
Refining
Nothing is ever perfect the first time. Do tweak your design to provide better gameplay, and don't be afraid to redraw an entire section if it doesn't work. Treat your "glamor shot" as a guide, rather than a straitjacket - don't let it ruin your level's functionality - and be willing to abandon it if it doesn't fit within the design you've created.
Annotate
One thing to remember, especially when designing exterior levels, is that ground is not flat. You've most likely included hills in your design (and if you haven't, how are you going to stop the playing from seeing the "edge" of your level in-game?), but remember that the level itself can have an overall slant, e.g. the southern part of the hillside might be lower than the northern part, and run slightly downhill as it heads West. Draw symbols on your map to indicate the height gradient where possible. Finally, number any points of interest on the map, and write a legend indicating what they are. This will help when it comes to designing the level in the toolset itself.
With all those steps done, you should be armed with a good map with which to start your level design in the toolset itself! But I'll leave that process for another day...


Sounds like good advice I would give myself (and practice). Maybe you can scan a pencil diagram you have done to show what you do.
ReplyDeleteI was actually planning to include a pencil diagram to show an area I've been working on - I'll post it as soon as I can.
ReplyDeletegood read! I'd love to see more of these topics! =)
ReplyDeleteI'm currently writing my own module, but I lack the knowledge and computer power to pull off any big modding... I'm planning to work out my idea as detailed as I can, including sketches & overviews of the new areas, and then publish them as a handle for someone who has the knowledge (all the while I am pooling up money for upgrades for my PC)